Showing posts with label boys. Show all posts

Friday, March 2, 2012

Paper Plane Party

I know today is supposed to be guest blogger Friday, but I've been absent for about a month so I thought I would do it this week. Sorry if you were looking forward to a guest blogger, I'll have one again next month for you.

Since last year, Elijah has been asking for an airplane party for his birthday. I had the theme picked out for the year but I didn't plan too much just in case he wanted to change his mind, which every three turning four year old does at some point. But the airplane idea stuck, so after Chloe's birthday I started to plan out his party. I have to say this was easier to plan since plane parties are so common. I had a lot of fun with it too. It reminded me of being back in grade school folding airplanes and using poster board. I do have to admit while this was the most cost effective party I've done so far, it probably was the most time consuming. It took me about a solid week of non stop working to do everything for his party. (I really need to learn not to procrastinate!) I got pretty much everything that I wanted to do for this party (which is a first) so was really happy how everything turned out.

I wanted to make his party a little different than all of the ones I've seen, so I made his theme a paper plane pilot program. My sister in law, Bonnie, is incredible and ridiculously talented with graphic designs and she made me invitations for the party. I wanted the pilot to look like Elijah, which he was really excited about. He also chose to have Elijah Airlines and wanted everything to be blue. I also used the graphics from the invite throughout the rest of the party decorations.

 I made a poster to greet everyone at the front door.

 For decorations, I made {paper plane garlands} and strung them up to go into a point over the tables. I also strung a few planes up throughout the house. 

I really wanted to have airline posters of different destinations for the party, and luckily I have family members that travel. A HUGE thank you really goes to my sister in law, Annie, since I used most of her pictures of Europe and Costa Rica and Alaska to make the posters. My other sister in law, Kayla, contributed Hawaii for me and I had the rest of them. I put up the posters around the house.


 Sadly I couldn't find a good picture from Japan except for these two


I also made cloud and planes mobiles to hang up in his room, where we had all of the games in. 


For the games, I wanted them to go along with learning to be a pilot, so for the first game we played red light green light to "learn how to take directions" and earn their compasses. The kids had a blast with it. Each round they had to do something different to get to the "air traffic controller" and the first person to get to them got the next turn of raising the flags. 

(this was the kids doing the kangaroo hop)

The next game we played was "learning to navigate a plane on the ground" so they had to go through an obstacle course riding little airplanes and they were able to earn their survival toy which was a paratrooper. The kids had fun going through the obstacle course, but I think they had more fun playing with the paratroopers which they had races throwing them down the stairs. 

 (Jed showed the kids how to do the obstacle course)


Our last game, they had to check their "flight skills" and make their own paper airplane and do a plane toss. The little kids got to stand on a stool and even Chloe was able to get hers to fly through the holes. 


After the last game, the kids earned their wings and their pilot licenses.


For this party I made the food table really simple. 


Over the table, I made a "Happy Birthday Elijah" garland using the same technique as the paper plane garland.


I decided to do "pilot pop" for drinks and found {this tutorial} for the pilot hats ( I was planning on making a hat for Elijah too, but ran out of time). I also made labels for all of the drinks using the same graphics from the invitation.


 Elijah had been asking me for rice krispie treats so I made them for his party and covered them in melted vanilla. I tried to make them look like paper planes. I did the cake for his party and have to admit that this might be my favorite looking cake that I've done so far. I made fondant cutouts of clouds and paper planes and even made one of the little pilot in the paper plane then piped on dashes after the planes to show their flight patterns. His cake was dark chocolate filled with blackberry jam and cookies and cream buttercream and covered in blackberry chocolate ganash. 


Since I had an extra 15 minutes before the party I quickly sewed on a paper plane to a shirt for Elijah. (I like when even their outfits fit the theme, I know I'm ridiculous) It was a really good thing I made the shirt for him too, because he pretty much ruined it with stains and it was only $3 for the the shirt so I'm okay with it. :)

For party favors, I made little " pilot suitcases" out of cereal boxes with each child's name. I filled them with "an advanced flight manual" which was a booklet of how to make complex paper planes. (You can find directions all over the internet for them) and I did a "complimentary of Elijah Airlines" bags of homemade cinnamon and sugar pretzels and honey roasted peanuts.


I also wanted to add another thank you for everyone who helped me with this party and all who came!

Saturday, December 24, 2011

DIY Handmade Gifts

This year I did a lot of homemade gifts. My friend Ashley asked me to be a guest blogger and show some of them on her blog. It was really exciting to actually be the guest blogger this time. It was my very first guest appearance and it was really sweet of Ash to ask me. I thought I would share it also here too.

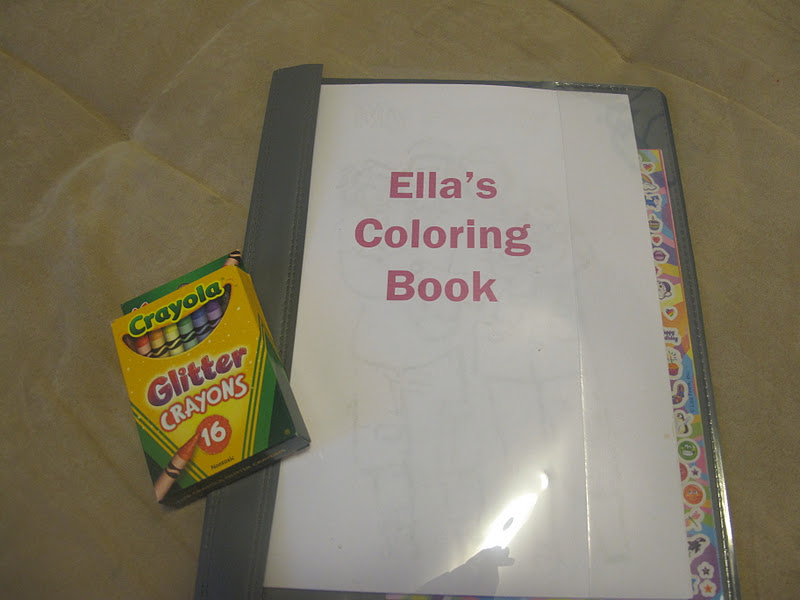
This year, I made my niece her own coloring book. I took pictures of all her family members (including extended) and took it into Photoshop to turn the photos into coloring pages. I just sent it off, so I'm not sure how she likes it yet, but my kids loved it. They thought it was so much fun being able to color their family members. You can get the how to from Photojojo at this link. Also, if you want to do this but don't have Photoshop you can also do at the Crayola website. A few tips if you use Photoshop: use the burn tool to help darken the edges and use the brush tool to create better outlines. I bought a cover for it but I was originally planning on making a cover for it. You can find the tutorial from Angry Chicken here.


This is a page from the coloring book of my adorable niece.

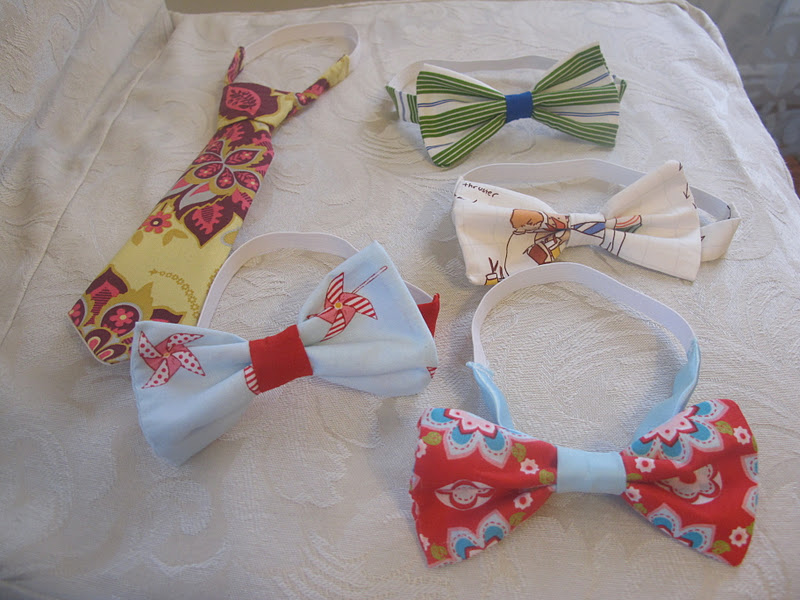
Since I'm always making accessories for Chloe, Elijah gets left out sometimes. To compensate, I make him ties. He loves them. He picked out some fabric and I'm making him some for Christmas. He also loves bow ties. I also made a few bow ties for my nephew this year. For babies I always attach elastic instead of a clip since they normally try to pull at them. This is something my sister in law can do (and has done) but I loved the fabric he chose. For the tie tutorial I used these two tutorials: Purlbee and Sharing the Wealth and for the bow tie I used this link from Prudent Baby.


Chloe loves backpacks right now and I thought I would make her one for Christmas. I looked at this tutorial from Prudent Baby for the drawstring backpack. I haven't finished it but this is the look I'm going for:

* this is from Goodies

I'm always making headbands for Chloe, or flower clips, and I made her this one for Thanksgiving. These make great gifts though and are easy to make and less than $1 to make. I used the tutorial from Mary Jane and Galoshes.


If you're not into sewing try this tutorial from 'A Girl and A Glue Gun' for a car mat. You can see her boy and girl versions. I haven't started this one yet (I might wait for his birthday in February). I thought this was cute and affordable. I also wanted to try a Batman theme since Elijah is really into Batman right now.


If you remember my earlier post that I did for Jed's Christmas gift, here it is. He loves it! He loves getting to open one each day and one of the things he liked the most were outings for him and the kids. He also likes the notes that I have attached to each day. Elijah also loves this. He is so excited to give it to Jed and even gets excited about the date ideas. He wants to come with us. 


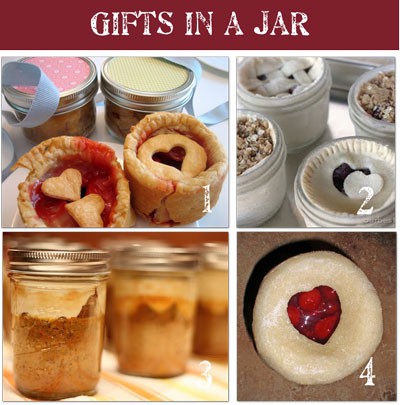
Since I'm also really into baking and I'm loving the mason jar gift ideas right now, I thought these were a cute ideas. I found a bunch on Tip Junkie and Under the Table and Dreaming. I thought these would be really cute to give to neighbors, friends, co workers or for the people I visit teach. Another cute idea is to give hot chocolate with a dessert tasting spoon for a stirrer. My husband's co worker gave us one and it reminded me of these dessert tasting spoons that I once saw. It's such a cute idea and easy and affordable to do.

*image from Tip Junkie


*image from shutterstock

I hope these help you with your own Christmas projects. Merry Christmas!


Saturday, August 6, 2011

Drive In Movies at Home

 Elijah has been recently obsessed with the movie Cars. (Actually, it was the first movie he ever sat through the entire thing when it first came out) He wants Cars toys and books and clothes... pretty much anything that has Lightening Mcqueen or Mater on it. I thought it would be fun to take him to see Cars 2 for a treat, but first, I wanted to watch the first movie to get him excited for the second (not that its necessary). I thought that I'd take the opportunity to make it an official movie night. But what better way to have fun with cars then to make your own out of a cardboard box and use it to watch movies in and drive around the living room with later?

I've been wanting to do this since before I was married and have held onto the project for a good five years now. So little to say, I was really excited to do this with the kids. Elijah was just as excited and he had a blast doing this too. He picked out all of the colors and even wanted to add the "number E on it for Elijah". He helped design Chloe's too. I just used stuff I had around the house (good thing we just moved so I have a TON of boxes) and we had a great time with it. I would probably paint the box next time (I just couldn't get to my paints) because the paper rips too easily with a toddler around. Obviously, if your kids are older/bigger you can do this with bigger/ longer boxes. You can even use one long box to fit in all the kids and not different boxes. This is such a fun and easy project and one that the kids will have so much fun with for hours and hours!

side not to self: mirrors face toward the driver not out :P
 And what's a movie without a little popcorn?

Thursday, June 30, 2011

Capes for Your Super Kids

I have two of the best kids ever! I know that every mom feels the same way about their own kids, and that's great too. But I just love my kids. They are always keeping me entertained and they both try so hard to help out, especially Elijah. He's always been my little "big" helper. He even helps to chase his little sister around and tries to mind her for me and helps to contain her. It's such a crack up to see them together. So, like I said before, I know that every mom thinks her kids are the best and are really super, so why not make them a cape for them to show off to the rest of the world how super they really are? :)

Elijah always comes up to me and asks me to tie his blanket around his neck so he can have a cape and pretends to be a super hero, so I have been wanting to make him a cape for awhile now, I just haven't gotten around to it. Luckily though, my sister-in-law threw her son a really cute and fun superhero/Batman party and the kids were invited to dress up too. We just moved so I don't have access to my sewing machine right now but I wanted to make the kids' costumes. Since capes are easy to make and pretty much just a bunch of straight lines, I bought heat and bond hem tape and it worked like a charm. I hand sewed on their logos to the back of their capes and onto a shirt for Elijah. Elijah LOVES his new cape and mask. He has so much fun dressing up in his costume and loves being a superhero. He's such my super little guy!


for the capes:
http://floatingworld.typepad.com/superhero.pdf
http://pukingpastilles.com/?p=57 (this one is reversible)
http://thegoodlifebyerin.blogspot.com/2011/01/superhero-capes.html
for the mask:
http://uklassinus.blogspot.com/2008/12/2-down-1-to-go-and-superhero-mask.html

Monday, April 25, 2011

A ruffled dress and bow tie

Lately, I have been checking out a lot of different sites for toddler dresses. With Easter coming up, and my husband not wanting me to buy outfits for the kids, I decided I would try my best to make them. Right now I'm obsessed with all of the ridiculously cute ruffled dresses that are everywhere, so of course that's what I chose to make for Chloe's dress. This is my first time making a dress too, so I wanted something that looked easy enough for a beginner. I don't know if that was this dress, but it made all of the other dresses I made after seem really easy. (Those tutorials will be shown in a different post). But I discovered that toddler dresses are so easy and cost effective!


I followed these directions of how to piece the dress together, but I made mine differently since I used left over fabric that I had lying around the house. If you want to do what I did, just take the fabric and fold it in half. Take a dress that is about the size you want to make yours and cut around it keeping a 1/4 in around to sew it together. Or cut a rectangle of the size you want your dress and cut out arm holes and a neck line, then sew them together. (In a later post I'll have a tutorial that will show how to do this for a better visual)

Of course I also had to make a headband to go with her dress. As I was looking for tutorials, I stumbled across this website and instantly fell in love Snazzie Drawers. The best thing about it is that she sells her patterns! And if you don't want to make your own, she has her own etsy store. I used her headbands as my inspiration (I just copied hers).  (To make the flowers for both the dress and headband, you can use this tutorial.)

For my son, I really wanted to make him a suit, but alas, I ran out of time (hopefully, that will be a later post).  I did, however, make him a bow tie. I wanted it to match Chloe's dress a little, so used the same blue fabric as her flowers. Also, to make this A LOT easier, I used a white elastic for the band, so he can put it on or take it off himself.  He loves his bow tie, but didn't let me take a picture of him wearing it.