Showing posts with label dessert. Show all posts

Thursday, February 2, 2012

Create a Date!

Hello all!  My name is Ashley and I am from Privilege Days, a blog that assists families with date ideas so that you'll never wonder where to go or what to do, when you want to spend time with your family.  I started this blog because family time is quite the privilege in my home, what with my husband's night shifts at work and his school schedule on his days off.  I decided to make a resolution to prioritize family dates so that we can get that quality one-on-one time to enrich our family and see how everyone is doing.  We call these dates our 'PRIVILEGE DAYS'.


We hold our Privilege Day dates four times a month, usually on a Friday or Saturday.  Since it's almost the weekend, I'm going to share with you a few date ideas that you can do with just you and your spouse, you and your children, and as an entire family....  {continue reading!}

Saturday, December 24, 2011

DIY Handmade Gifts

This year I did a lot of homemade gifts. My friend Ashley asked me to be a guest blogger and show some of them on her blog. It was really exciting to actually be the guest blogger this time. It was my very first guest appearance and it was really sweet of Ash to ask me. I thought I would share it also here too.

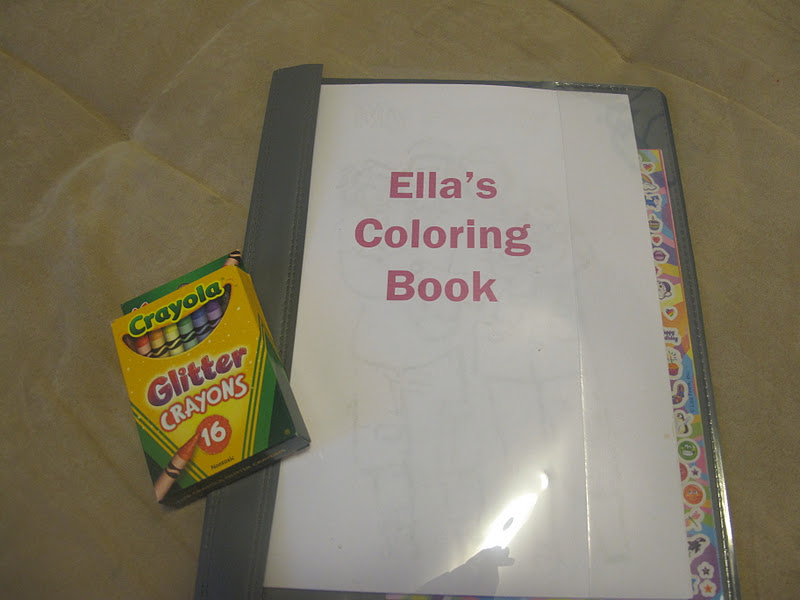
This year, I made my niece her own coloring book. I took pictures of all her family members (including extended) and took it into Photoshop to turn the photos into coloring pages. I just sent it off, so I'm not sure how she likes it yet, but my kids loved it. They thought it was so much fun being able to color their family members. You can get the how to from Photojojo at this link. Also, if you want to do this but don't have Photoshop you can also do at the Crayola website. A few tips if you use Photoshop: use the burn tool to help darken the edges and use the brush tool to create better outlines. I bought a cover for it but I was originally planning on making a cover for it. You can find the tutorial from Angry Chicken here.


This is a page from the coloring book of my adorable niece.

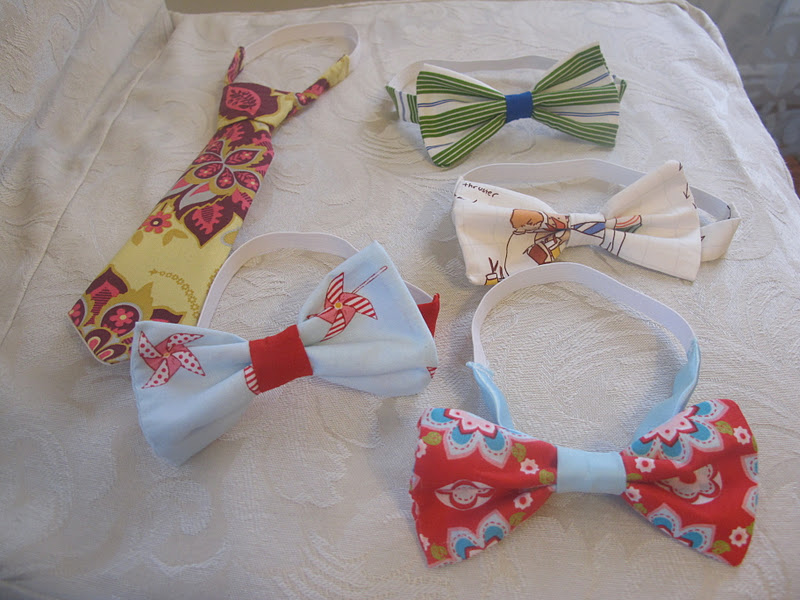
Since I'm always making accessories for Chloe, Elijah gets left out sometimes. To compensate, I make him ties. He loves them. He picked out some fabric and I'm making him some for Christmas. He also loves bow ties. I also made a few bow ties for my nephew this year. For babies I always attach elastic instead of a clip since they normally try to pull at them. This is something my sister in law can do (and has done) but I loved the fabric he chose. For the tie tutorial I used these two tutorials: Purlbee and Sharing the Wealth and for the bow tie I used this link from Prudent Baby.


Chloe loves backpacks right now and I thought I would make her one for Christmas. I looked at this tutorial from Prudent Baby for the drawstring backpack. I haven't finished it but this is the look I'm going for:

* this is from Goodies

I'm always making headbands for Chloe, or flower clips, and I made her this one for Thanksgiving. These make great gifts though and are easy to make and less than $1 to make. I used the tutorial from Mary Jane and Galoshes.


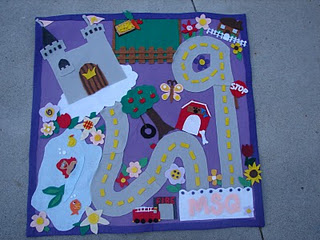
If you're not into sewing try this tutorial from 'A Girl and A Glue Gun' for a car mat. You can see her boy and girl versions. I haven't started this one yet (I might wait for his birthday in February). I thought this was cute and affordable. I also wanted to try a Batman theme since Elijah is really into Batman right now.


If you remember my earlier post that I did for Jed's Christmas gift, here it is. He loves it! He loves getting to open one each day and one of the things he liked the most were outings for him and the kids. He also likes the notes that I have attached to each day. Elijah also loves this. He is so excited to give it to Jed and even gets excited about the date ideas. He wants to come with us. 


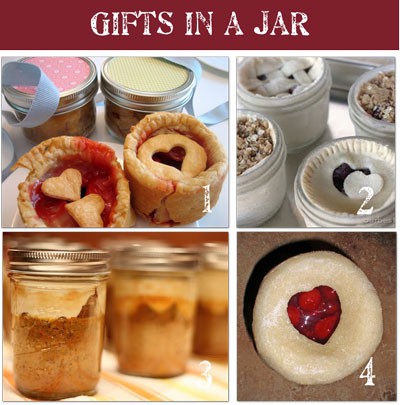
Since I'm also really into baking and I'm loving the mason jar gift ideas right now, I thought these were a cute ideas. I found a bunch on Tip Junkie and Under the Table and Dreaming. I thought these would be really cute to give to neighbors, friends, co workers or for the people I visit teach. Another cute idea is to give hot chocolate with a dessert tasting spoon for a stirrer. My husband's co worker gave us one and it reminded me of these dessert tasting spoons that I once saw. It's such a cute idea and easy and affordable to do.

*image from Tip Junkie


*image from shutterstock

I hope these help you with your own Christmas projects. Merry Christmas!


Monday, November 7, 2011

Pummple Pie Cupcakes

Sorry if people are getting tired of all of the recipes lately. Right now I'm in limbo with my projects since we're moving this weekend. To make up for it, that and in fall all I want to do is bake and warm up the house, I've been experimenting with some baking ideas. One of them is this pummple pie recipe.

You might be asking yourself "what the heck is pummple?" Well, it's pumpkin and apple together. I thought of this last year and have been obsessed with the concept since then. I really wanted to make it for Thanksgiving last year but everyone was a little hesitant about it so I stuck with our traditional pumpkin pie. I do love the pumpkin pie because it's all fresh ingredients and it calls for fresh pumpkin puree. It's takes a little bit more time but it really is worth it, especially if you like pumpkin pie. You'll be getting that recipe down below so don't worry :) Last year I made up a recipe for a caramel apple pie with a sugar cookie pie crust and it was also one of my favorite new recipes. So for this pummple pie recipe I just combined both pies. Of course I'm not the only person that genius struck with this pie combo, and I'll be experimenting with it in some other ways, but this might be my favorite pie. Obviously, you don't have to make these into cupcakes (okay cupcake shaped since, as Jed points out, there is no cake in this), it's just what I did.

Sorry, there aren't any pictures, I wasn't planning on sharing this yet but since I've had requests for the recipe I thought I would, plus these went fast and the last one was eaten before I had the thought to actually take a picture of it. I'll just have to make these again to later update this with a picture :) This was also just me experimenting, so I want everyone to know this is my rough draft and I might not have exact amounts for everything. I'm a little in love with these right now though and everyone I had sample them gave positive reviews for them. Jed even took some to work and one of the guys said he doesn't normally like pumpkin pie or apple pie but he couldn't stop eating this. Another guy said that he really liked it and liked that it tasted really fresh. Jed, of course, said this is now one of his favorites too. So I hope you like these as well. If you do make these leave me a comment and let me know what you think. Thanks!

Makes 24 cupcakes:
Line cupcake pan with liners. Spray inside of cupcake liners with baking spray so these won't stick. Preheat oven to 350 degrees F.
If you do choose to go all out and make the pumpkin puree yourself, do that first (see instructions below)

Crust: (found on allrecipes)
1/2 egg
3 tablespoons white sugar
1 pinch salt
1 1/2 c flour
1/2 c cold butter, cut into pieces

Preheat oven to 400 degrees F. 
In a small bowl, mix egg and sugar together. In a separate bowl, combine salt and flour. Cut in butter. Stir in egg mixture, then knead dough into a smooth ball. Keep refrigerated for 15 minutes. (during the 15 minutes start on apple filling) Roll dough to 1/8 " thickness. (best way to do this is roll it out between sheets of wax paper)
For cupcakes: cut out 24 circles to match the bottom of cupcake liners. This is optional but I think it was good, I used small decorative cookie cutters to cut out 24 shapes for the tops too and sprinkled them with sugar.
For pie: roll out and place in pie pan; prick edges with a fork and cover edges with foil so they don't burn
set aside

Caramel Apple Filling:

caramel sauce: (my mother in law's recipe)
1 c brown sugar
2/3 c light corn syrup
2 tablespoons butter
2/3 c evaporated milk
1 teaspoon vanilla

In a medium saucepan boil together the sugar, corn syrup, and butter until sugar is dissolved. Remove from heat. Add milk and vanilla. Stir well.

5 large granny smith apples; peeled, cored and chopped
1 oz. water
2 teaspoons corn starch
1 teaspoon cinnamon
caramel sauce to coat

In a small cup dissolve cornstarch in water. In a pan over medium heat, saute apples with caramel sauce (not all the sauce just enough to coat apples with), cinnamon and cornstarch mixture until the apples are tender. Take off heat. Let cool for 10 minutes. Spoon apple filling into prepared cupcake/pie pans until about 1/2 full. Set aside.

Pumpkin Pie Filling: (adapted from Busy Cooks/About.com)
(This is my fresh pumpkin pie recipe, for the cupcakes I cheated and just used canned pumpkin puree)

1 medium sugar pumpkin (or 2 cups canned pumpkin puree)
1 tablespoon veg. oil
1/2 teaspoon each ground ginger, cloves, nutmeg and salt
1 teaspoon cinnamon
4 eggs, beaten
1 c honey, warmed
1/2 c milk (I used eggnog this time)
1/2 c whipping cream

To make the fresh pumpkin puree: preheat oven to 325 degrees F . Cut pumpkin in half and remove seeds. Lightly oil the cut surface of the pumpkin halves, and place cut side down on a cookie sheet that has been lined with foil and lightly oiled. Bake until the flesh is tender when pierced with a fork. Let stand until cook enough to be handled. Scrape pumpkin flesh from the peel and puree in a blender or food processor

In a large bowl, blend together 2 cups pumpkin puree, spices and salt. Beat in eggs, honey, milk and cream.

Pour filling over the top of apple filling until almost to the top of cupcake liner/pie pan. 

Okay, here's what I'm not exactly sure about... the bake time. I started at 20 minutes but they still weren't done so I think I put on another 10 minutes. Bake until toothpick inserted comes clean or until the pie springs back. If you do add the pie crust cutouts on top add those half way through baking (about 15 minutes). If you're doing this in good old fashion pie form this is the time to take off the foil from around the edges too. 

Now, here's the hard part: You HAVE to let them cool! If you're like me and really excited to try it-you must stop yourself! Let them cool before taking them out of the cupcake pans otherwise the sides get smashed and they won't be as pretty and the paper will come off of them. But after you let them cool, add a dollop of whipped cream or vanilla ice cream and enjoy!

Saturday, October 29, 2011

Pumpkin Spice Cupcakes

 One of my favorite fall treats is pumpkin cupcakes. My mother-in-law bought really cute witch picks for a  a Witches Tea Party and asked me if I would make cupcakes to go along with them, and with my obsession of pumpkin I was already planning on making these cupcakes, but this gave me an excuse to actually do it. Unfortunately, my recipes are still packed away in boxes so I had to hunt out another recipe for pumpkin cake to use this year. I whipped up some new recipes for frostings as well and all in all it turned out one wickedly delicious cupcake.


I found this recipe from Annie's Eats and was pretty happy with it. I did make a few changes so I'll post my adapted recipe if you want to use it.

2 2/3 c flour
2 teaspoons baking soda
2 teaspoons baking powder
1/2 teaspoon nutmeg
1/2 teaspoon cloves
1/4 teaspoon ground ginger
1/4 teaspoon allspice
1 teaspoon salt
1 (15 oz.) can pumpkin puree
1/2 c oil
1/2 c applesauce
4 large eggs

To make the cupcakes, preheat the oven to 350°F.  Line cupcake pans with paper liners.  In a medium bowl, sift together the flour, baking soda, baking powder, and spices.  Set aside.  In the bowl of an electric mixer, blend together the pumpkin, granulated sugar, brown sugar, applesauce and oil. Add the eggs one at a time, beating well after each addition.  With the mixture on low speed, add the flour mixture in two additions, mixing just until incorporated.

Fill the cupcake liners about three-quarters full.  Bake until the cupcakes are golden and a toothpick inserted into the center comes out clean, 18-20 minutes.  Transfer the pans to a wire rack and let cool for 10 minutes, then remove the cupcakes from the pans and let cool completely.

This time I decided to fill my cupcakes with a white chocolate, cream cheese, peach, whipped cream. (That's a mouthful, but a yummy one) You'll also have left overs of this to enjoy later.

4 oz white chocolate, melted
4 oz cream cheese, softened
1 c whipping cream, chilled
3/4 c powdered sugar
2 (15 oz) can of peaches, chunks (fresh and frozen works well too) and drained completely

In a large mixing bowl, whip cream cheese then add melted white chocolate and continue to beat until fully incorporated and creamy. In a separate bowl, beat whipping cream until soft peaks form add sugar and continue to beat. Combine whipped cream in with cream cheese mixture, and beat until fully incorporated. Stir in peaches.

To fill cupcakes, I cut a circle (or you can use a small circle cutter) in the center of the cupcake. Spoon in filling and replace the tops of the cupcakes.

I should say that I really do enjoy cream cheese, but haven't been a big fan of cream cheese frosting so I always alter it to suit my own preferences. So for the frosting I made a white chocolate cream cheese frosting and made ruffles to look like the pettiskirt of the witch.

5 oz. white chocolate, melted
12 oz. cream cheese
5 tablespoons unsalted butter
1/2 teaspoon cinnamon
zest of orange

Whip the cream cheese and butter in a large mixer until creamy, add white chocolate and continue to cream together. Add cinnamon and orange zest and beat until fully incorporated.

Hope you enjoy these as much as I did!

Tuesday, September 6, 2011

PB&J Chocolate Chip Cookies

Ok, I'm finally going to do it! I'm going to attempt an actual tutorial. I decided it was about time to make one and I figured I should start off with something easy, like cookies. The next one I'll attempt will probably be a skirt or dress for Chloe, but since I don't really know what I'm doing when I'm sewing and just make it up as I go and cross my fingers it turns out, I haven't tried to tackle a tutorial yet. But I will. Sometime... Soon? Hopefully. :) Anyways, enough babbling about future things to come. Let's focus on this:


I know it doesn't really seem like anything special, and it might not be except to me, but I'm really excited about this cookie. Why, you might ask? Well, not only is this my first tutorial but this is my first cookie recipe I've made on my own. While I have made up a few of my own recipes for other things in the past, when it comes to baking I normally find a recipe that looks good and then enhance it here and there with my own tastes and preferences. But this is my first cookie recipe I've masterminded. I was actually going for a flavor profile that I wanted to try and instead inspiration hit and I came up with these cookies instead. If anyone has ever had one of my cupcakes, you would know that I always have a filling in them. These cookies stay true to my cupcakes.

First, I'll start with the list of ingredients. You will need:

1/2 c shortening
1/2 c unsalted butter, softened
1 c brown sugar, packed
3/4 c white sugar
1 1/4 c peanut butter
1 tsp. vanilla extract
2 eggs
1 3/4 c flour
2 tsp. baking soda
1 tsp. salt
1 tsp. cinnamon
1 c mini chocolate chips (regular chocolate chips work fine as well)
1 c jam

Once you've assembled all of your ingredients, preheat your oven to 350.

In a large bowl, cream together shortening, butter, sugars, and peanut butter until smooth.


 Add vanilla and continue to beat.

Beat in eggs, one at a time until well blended.


In a small bowl, combine flour, baking soda, cinnamon, and salt.

Stir into the creamed mix until its completely incorporated.


Stir in chocolate chips.


Refrigerate for about an hour. Then take about 2 tsp of dough and roll them into balls. Place on cookie sheet about 1-2 inches apart. Press thumb print into middle of dough ball.

Add 1/2 - 1 tsp (depending on your preference) your choice of jam into thumb print

Take another 1 1/2 tsp of dough and press flat and cover dough ball and jam so no jam is visible.


Bake for 15 minutes or until golden brown.

This is an optional thing if you want do it, these cookies are good with or without the extra chocolate. Melt chocolate on low heat while you wait for your cookies to bake and use a fork to drizzle it on top of your cookies.

Wait to cool for 10 minutes, pour yourself a glass of milk and enjoy!

This recipe makes between 3-4 dozen cookies.

Feel free to leave comments on any variations or suggestions you may have on the cookie too. :)

Wednesday, August 3, 2011

The Best Brownies

It all started with the raspberries. A few days after moving, we found this little farm off the side of the road with the most beautiful and gigantic raspberries. We found it by accident and so we have no idea where to find it again. :( As soon as we tasted the ripe, plump, sweet and juicy raspberries, I immediately thought of this brownie recipe that I had seen on Desserts for Breakfast's blog. I've been wanting to make them for awhile but hadn't had the opportunity. This just seemed like the perfect welcome after our move.

I actually made these brownies a month ago and I still think about them. This is by far the best homemade brownie recipe that I have tried. They are just so gooey and rich and so satisfying. It was hard not to eat the entire pan by myself (I mean it would've be rude not to share or at least it'd make me look like a pig since it's a 9x13" pan). And the best thing about this brownie is that its dark chocolate. When you're craving something super chocolaty and something so delicious that will keep you content for hours after you eat it, this is what you need to make!

YUM!